
the production for my Unit 9 project
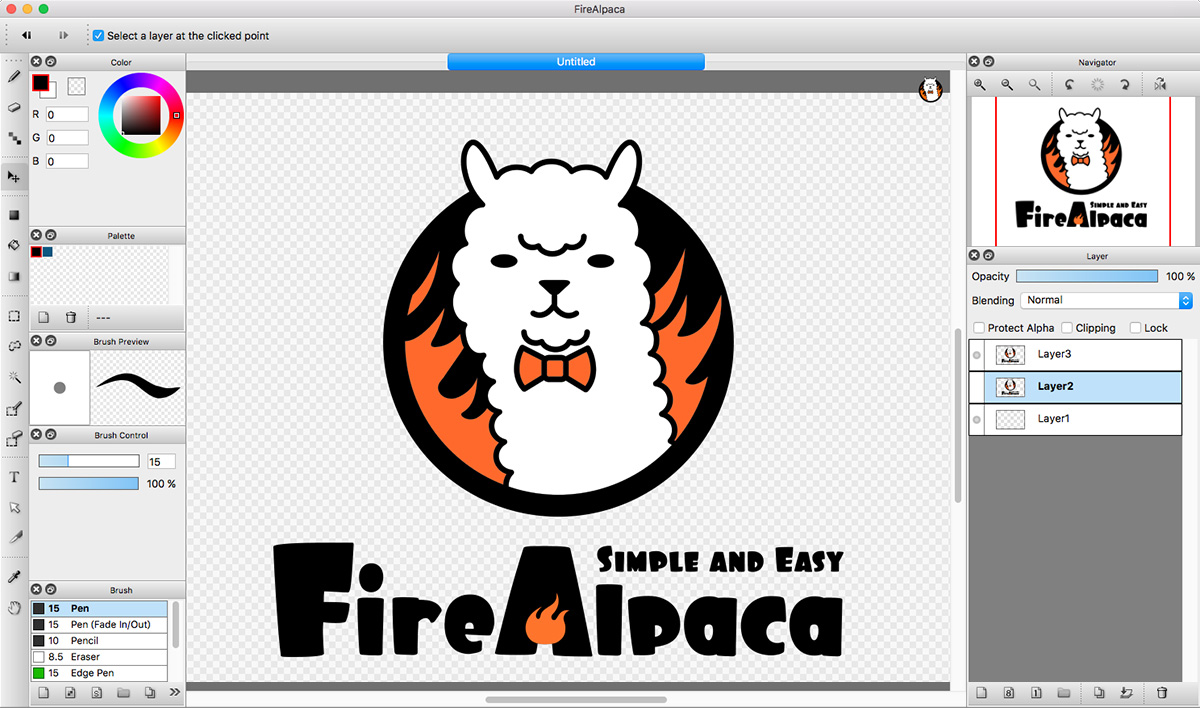
the program i have been using to create my animations are on fire alpaca which is primarily a drawing app but can also do animation stuff.
this was my initial idea which I branched on and had many idea's for however I did change my idea a couple of times
this was the final product before I changed my idea almost completely as I changed the style and the song but I still wanted to do an animation
I changed my idea to make it into the style of hollow knight and have the song specifically made for the animation which my dad is going to compose
for one of the scenes I wanted to try a walking animation to experiment more with movement I looked at an image that helped describe how to do it and I simplified it as my characters overall design is rather simple, so the process was easier.

for the new art style idea that I have, these are the general image idea's


I wanted to establish where the main character was in the scene and what he was doing which was being intrigued by the rain (wanted to show the personality of him) this also shows him with his guard lowered. to make the character look upwards I simply rotated his head slowly to make it seem natural


I would then export it to a video as if I tried to add every single frame into one edit it wouldn't load properly and be very slow

As of 05/11/2020 I have to do one or two more scenes at most and then the music which shouldn't take too long i may be able to finish it by tomorrow
There were some issues that I faced during the editing and animating parts that could have effected everything I have made.

I wanted to attempt a walking sequence and thought that it would look good in an animation and decided to use it in my piece. for animating the walking scene I used the reference above and for the background I wanted something simple yet distinct enough to set the scene. while drawing it I did try to make the lightning flash but I don't think it worked when it was made into a video.

I wanted a filler scene to help establish the scene better and make the scenes flow into each other better and to show what the next scene is going to be, with this scene I used the transform tool to make him look downward.

I wanted this animation to have a supernatural feel to it and wanted to have rain in the sequence so I made a puddle which goes into the sky like rain but backwards with this I had to keep the rain cohesive with each other to actually make it look like its going upwards.


for this part of the animation I intend of something happening in a scene after this one so i wanted a back shot of the character (I'll refer to him as hero from now on)
and that is as much I have as of 15/10/2020 for the scenes
and that is as much I have as of 15/10/2020 for the scenes
as for making it into a video I have a program at home and have used premier pro at college to make this
as of 06/11/2020 i have finished the animation portion of my project I have yet to add the music

for this scene I wanted to have a more dynamic pose so I wanted to have him turn his head to look over his shoulder at something behind him which was pretty easy to achieve as his head shape is just a sphere however his hood and horns were a little difficult to get right.

This scene is a minor filler to establish the scene and flow's into the next scenes easily

I knew that I wanted to have the ghost speeding to the character to attack him the first attempt I did of this didn't really work so tried to do it again but make it faster and make it look better from a different perspective.

for the making of this scene I didn't want to do the same thing as my previous attempt which made the ghost go up and down as it moved which I didn't think fit the themes I was going for to I didn't put each frame next to another to make it seem like the ghost is moving faster.

When doing this scene I struggled with it quite a bit because I couldn't get the anatomy correct and it was difficult to get the shoulder to work with the scene so I decided to make it quicker so that the shoulder issue wasn't too noticeable and I think it works well like this

Beforehand this scene wasn't here but I felt that this helps the scene transition better which was very much needed as the change in scenes was way too abrupt so I feel that this help the scenes flow a lot better and it adds more to the character

for the hit of the ghost I wanted to show the ghost disappear so it actually looks like it got sliced for this I did run into a couple technical difficulties which almost made me lose all of the frames as my computer restarted without warning however I didn't lose too much of it but I did have to redo some slides.

I added this scene to make the scene before and after it flow together better, as without this scene it cuts in way that isn't very natural so I added this to make them work together better

I wanted the main character to be shown with all the ghost's surrounding him in a semi distanced shot to establish the final scene of the animation

as for the credit scene this did take a while to make as my computer wasn't loading at all possibly because I had too many files open or I created too many layers in the drawing app but I managed to get it all done and I think that it looks kinda interesting.
the program I have at home was already on there when I got my laptop and is easy to use as you are able to fill the the frames per second of the animation and it'll do it for you .
Premier pro however, I had a little more difficulties trying to make it last the amount of time I wanted it to and took a couple attempts to make it work, as well as the resolution was a bit choppy.
however I managed to achieve the concept I wanted by shortening the individual images so they lasted 0.3 seconds
I think the rest of the animation editing I will do at home since it is easier to use
For this scene I wanted to get one of the ghost's from my animation to move around and get closer to the screen to explore new techniques. However this particular scene didn't really fit the aesthetic of the animation so I decided to not use it. I felt that it wasn't the right tone and looked out of place compared to the other scenes that I had but I think that I still want to have something similar in my animation but a bit different.
the initial reason I changed my idea for the animation was because the previous animation didn't have a background and I wanted it to look much better so I wanted a background. For the backgrounds that I have for my new animation, the inspiration for the new backgrounds are from the game hollow knight but i simplified them to silhouettes.
For this part of my process I was putting my characters image to the background while having the background transparent behind the character so the character wasn't in the background.
In the app Fire Alpaca there are onion skin layers that allow you to see the layers before and after the current layer you are on but not in full opacity but this allows each layer to be each frame of a sequence
for this scene I wanted the character to have some shading to get better perspective
with the following screen shots they came out a bit blurry which I am not too sure as to why that is

for this screen shot it is supposed to show that I am putting the edited scenes onto the timeline however a lot of these are blurry but I edited them together in premier without the sound.

with all of the scenes put together in premier pro it did look a little blurry when it was playing I dont know whether it is because of the resolution or its something else,

I thought that it could be a good idea to have some credits at the end to make it more professional and give credit to the other individuals involved in the making of my project

the main parts of this animation is the animation itself as well as the music which was composed by my dad as of 05/11/2020 the music has yet to be timed to the animation as I still have a scene or two left to complete

I have decided to edit mostly at home as the software that i have been using is a lot easier for animation purposes, it is an editing software which was already on my laptop when I got it.

for this part of my editing it will show how I got the individual scenes/ images into videos in this program.

I would first get all of the images into the timeline and edit the time for how long an image stay's on the screen, the default time is 3 seconds per image and I would typically change it to 0.1 seconds or 0.15 at most

once I've changed the time frames the video would play at those time frames and and flow properly


Once the video has exported I would add it to the other video's I have exported into one edit and it would only run slow if there is too much footage on the timeline so it is a bunch of exporting and importing footage to make it run smoothly.
Issues I faced
when I was drawing and was about to save the frames I had, but before I could my laptop decided to restart without warning and I didn't manage to save it :
However when I turned it back on my images had been auto-saved but not all of them so I have to redo some scenes but most of it had auto-saved so I could export it after I had redone the scenes i had lost.
This issue happened twice on the same day, when editing my scenes together my laptop decided to crash I had to turn it off but not the proper way that you are supposed to :
the first time this happened it was easy to continue since the editing software auto saves, it did take a while for it to turn on and load but other than that it was fine.
But the second time it refused to turn on for ages and even when it was on it loaded very slowly and had to check and redo some of the editing process again.


this issue occurred when I was doing my credits, when my laptop didn't load anything for ages and as I was adding letters every slide it took me an hour to write my surname because it didn't really load anything I was doing.
for the music:
my dad is composing the music for my animation and is using the programme Cubase and using the spitfire sound library for better instrument sounds.
he is composing and making the melody of the song on my animation using his keyboard but using the sounds on the spitfire sound library to change the type of instrument and the way its played.


my dad had multiple idea's for this animation however it was rather challenging to get it to fit the 34 seconds of my animation but he enjoyed doing it and hopefully will be helping with other projects
the other idea's didn't really fit the theme I was going for in my animation so the melodic progressions were either kept but the sound of them was changed or he came up with new melodies but kept the previous ones for other projects as a starting point.
The deadline for the animation was hitting it close as he had been working on the scenes I had completed however the full thing wasn't done yet so he had to rush it and that was purely my fault as I didn't plan my time well so that my dad could make the music with the complete animation until a few day's before the deadline.

No comments:
Post a Comment